The Cheque Printing option in the Banking menu enables you to print the pending, already printed or the required cheques continuously from a single screen. You can also update the cheque details and have track of cheques to be printed, of a selected or all banks.
Accessing Cheque Printing
1. Go to Gateway of Tally > Banking > Cheque Printing .
The Select Bank screen displaying the List of Bank appears as shown:
2. Select All or the required Bank account from the List of Bank .
3. Press Enter .
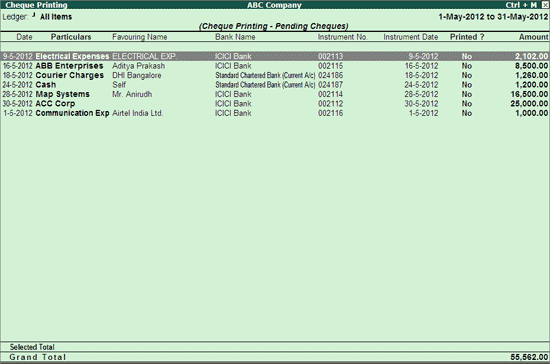
The Cheque Printing screen of the selected Bank is displayed as shown:
4. By default, this screen displays list of pending cheques of the current date’s month.
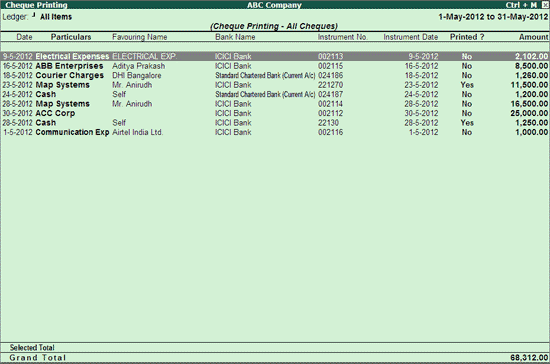
5. Click F6: Show All to display all the cheques.
Note: On clicking F6: Show All , you can toggle to F6: Hide Printed .
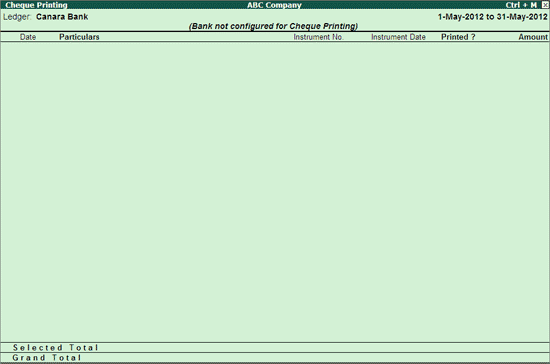
The
cheque printing screen will prompt with a message Bank not configured for Cheque Printing when the bank ledger not configured for cheque printing is selected, as shown:
The bank needs to be enabled for cheque printing from ledger alteration screen.
In the Cheque Printing screen of the ledgers configured for it:
● Select the required row from the Cheque Printing list to open the voucher in alteration mode.
● F2: Period : Allows to change the period.
● F4: Bank : Allows to select All / Other required Bank from the list.
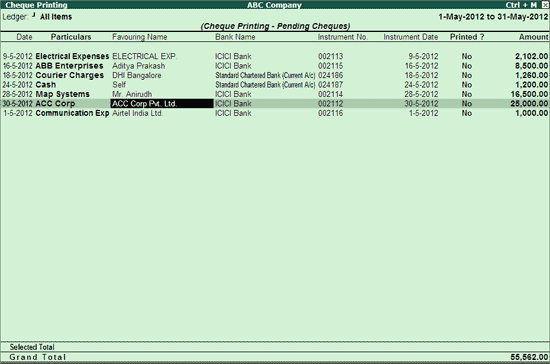
● F7: Edit Ch Details : Allows to edit/update the Favouring Name, Instrument No and Instrument Date columns, as shown:
● Accept the screen to save the settings.
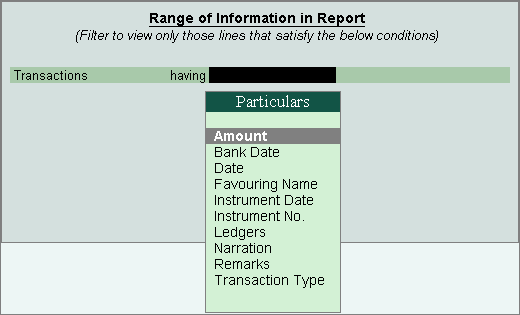
● F12 : Range : Allows to filter the Cheque printing screen. The user can filter the transactions based on the Amount, Bank Date, Date, Favouring Name, Instrument Date, Instrument No., Ledgers, Narration, Remarks and Transaction Type as shown:
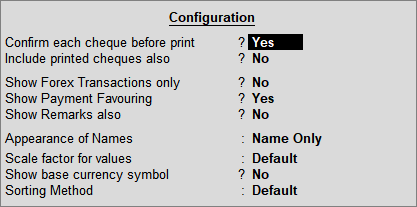
● F12: Configure : Allows to configure the details you want to view on Cheque Printing screen. The Configuration screen appears as shown below:
Enable the options, as required:
o Confirm each Cheque before Print? to display a confirmation prompt before printing each cheque.
o Include Printed Cheques also? to display cheques that have been printed in the report.
o Show Forex Transactions only? to display transactions recorded using a foreign currency.
o Show Payment Favouring? to display the Favouring Name in the report.
o Show Remarks also? to display the remarks.
o Select the required Display Name Style .
o Select the required Scale Factor from the list.
o Select the required Sorting Method from the list.
The cheque printing report screen will be displayed according to the configurations defined.
Selecting Printer
1. Click S : Select Printer .
2. Select the Printer from the List of Printers .
Changing the Orientation
1. Click N : Orientation to view the Cheque Printing Orientation screen.
2. Select the Cheque Printing Orientation, as required.
3. If the orientation selected is Vertical, then select Front/ Rear in the field Print From (for Vertical Only).
The Cheque Printing Orientation screen appears as shown below:
Free Demo Available for All Products:
Configuring Overall Adjustment
1. Click F12: Configure .
2. Enter the dimensions as required.
o Adjust Distance From Top Edge (in mm) : To adjust the distance from top edge such that the overall measurements defined in Cheque Dimensions screen get shifted as per the ‘mm’ entered here.
o Adjust Distance From Left Edge (in mm) : To adjust the distance from left edge such that the overall measurements defined in Cheque Dimensions screen get shifted as per the ‘mm’ entered here.
o Print Amount in Foreign Currency : Set this option to Yes , to print cheques for foreign currency transactions in the respective currency.
o Print Date : By default the date gets printed on the cheque. If the date is not to be printed on the cheque set this field to No .
3. Enable the option Print Amount in Foreign currency , if required.
4. Set the option Print Date to No , if the date is not to be printed in the cheque.
The Cheque Printing Configuration screen appears as shown below:
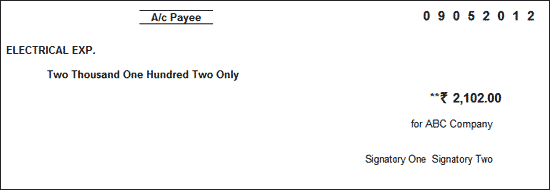
5. Press Enter to save. The adjustments done for overall adjustment using F12: Configuration of cheque printing screen does not affect the settings of cheque dimensions pre-configured for the selected cheque format. The printed cheque appears as shown below:
Printing Selected Cheques
1. Go to
Gateway of Tally >
Banking >
Cheque Printing .
2. Select All or required Bank account from List of Bank to view t he Cheque Printing scre en.
3. Press spacebar to select the required row(s).
4. Click P : Print to view the Cheque Printing screen.
5. Press Enter to prin t. Only the selected cheques will be printed.